
Getting Started
Welcome to QRCompose! This guide will walk you through creating your first interactive QR experience in just a few minutes.
Sign Up & Log In
Creating Your Account
- Visit app.qrcompose.com
- Click Sign Up in the top right corner
- Enter your email and create a password (or use Google/social sign-in)
- Verify your email address
- Choose your subscription plan (or start with the free trial)
Free Trial
New users get a 7-day free trial with full access to all features. No credit card required to start!
Logging In
Once registered, simply log in with your credentials at app.qrcompose.com
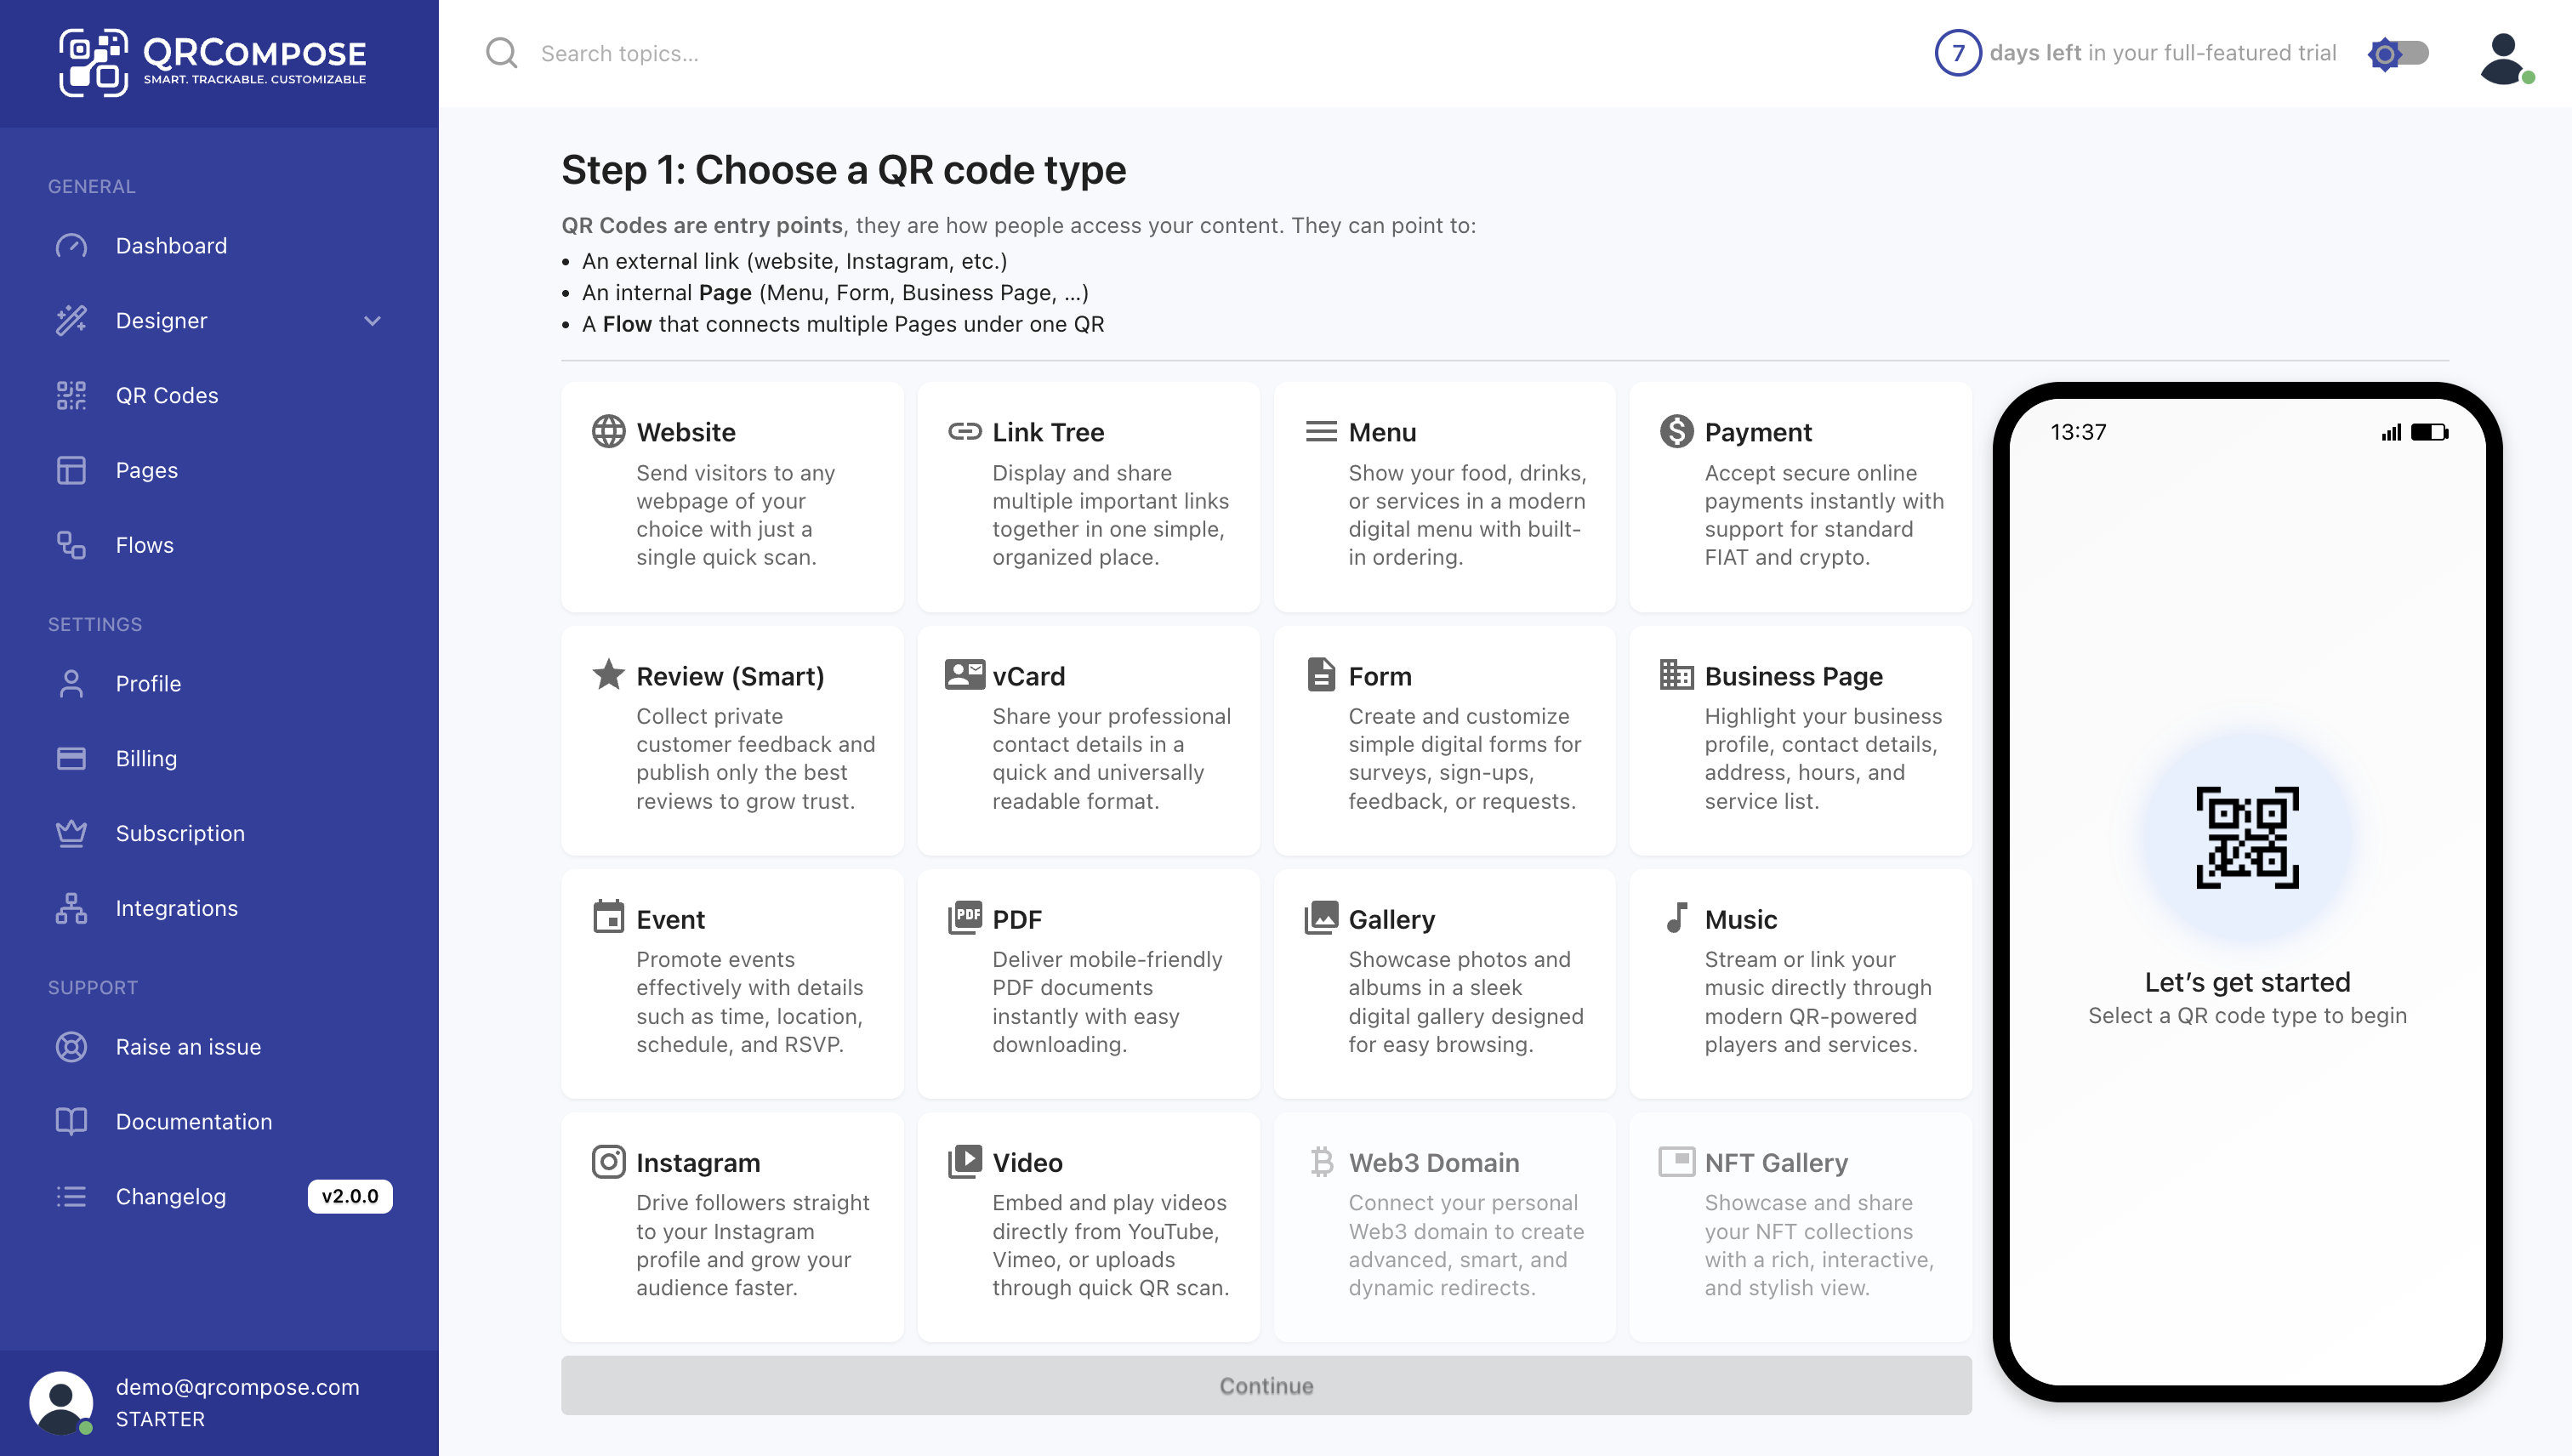
Understanding QR Code Types
Before creating your first project, it's important to understand the two types of QR codes:
Static QR Codes
- Point to a fixed URL that never changes
- Cannot be edited after creation
- No analytics tracking
- Best for: One-time use, permanent displays
Dynamic QR Codes (Recommended)
- Point to a flexible URL managed by QRCompose
- Can be updated anytime without reprinting
- Full analytics and tracking enabled
- Best for: Businesses, events, marketing campaigns
Why Dynamic?
Dynamic QR codes give you complete control. Update your content, change destinations, track performance—all without reprinting your QR code.
Your First Project
Let's create a simple Link Tree experience as your first project.
Step 1: Create a QR code
- From your dashboard, click Designer -> Create a QR code
- Give it a name (e.g., "My Social Links")
- Select Link Tree as your starting component
- Click Create
Step 2: Add Your Links
In the Link Tree builder:
- Click Add Link to create your first link
- Enter:
- Label: e.g., "Instagram"
- URL: Your Instagram profile URL
- Icon: Choose from the icon library (optional)
- Repeat for additional links (Twitter, LinkedIn, Website, etc.)
- Drag and drop to reorder your links
Icons
Icons make your link tree more visual and engaging. Choose from our library of 1000+ icons or upload custom ones.

Step 3: Customize the Appearance
- Click the Theme tab in the right sidebar
- Choose a preset theme or customize:
- Background color or image
- Button style (rounded, square, pill)
- Typography (font family, size, weight)
- Colors (text, buttons, accents)
- See your changes in real-time in the preview panel
Step 4: Configure Your QR Code
- Click the QR Code tab
- Customize your QR appearance:
- Color: Match your brand colors
- Shape: Dots, squares, or rounded
- Logo: Upload a center logo (optional)
- Frame: Add a call-to-action frame around the QR
- Preview your QR in real-time
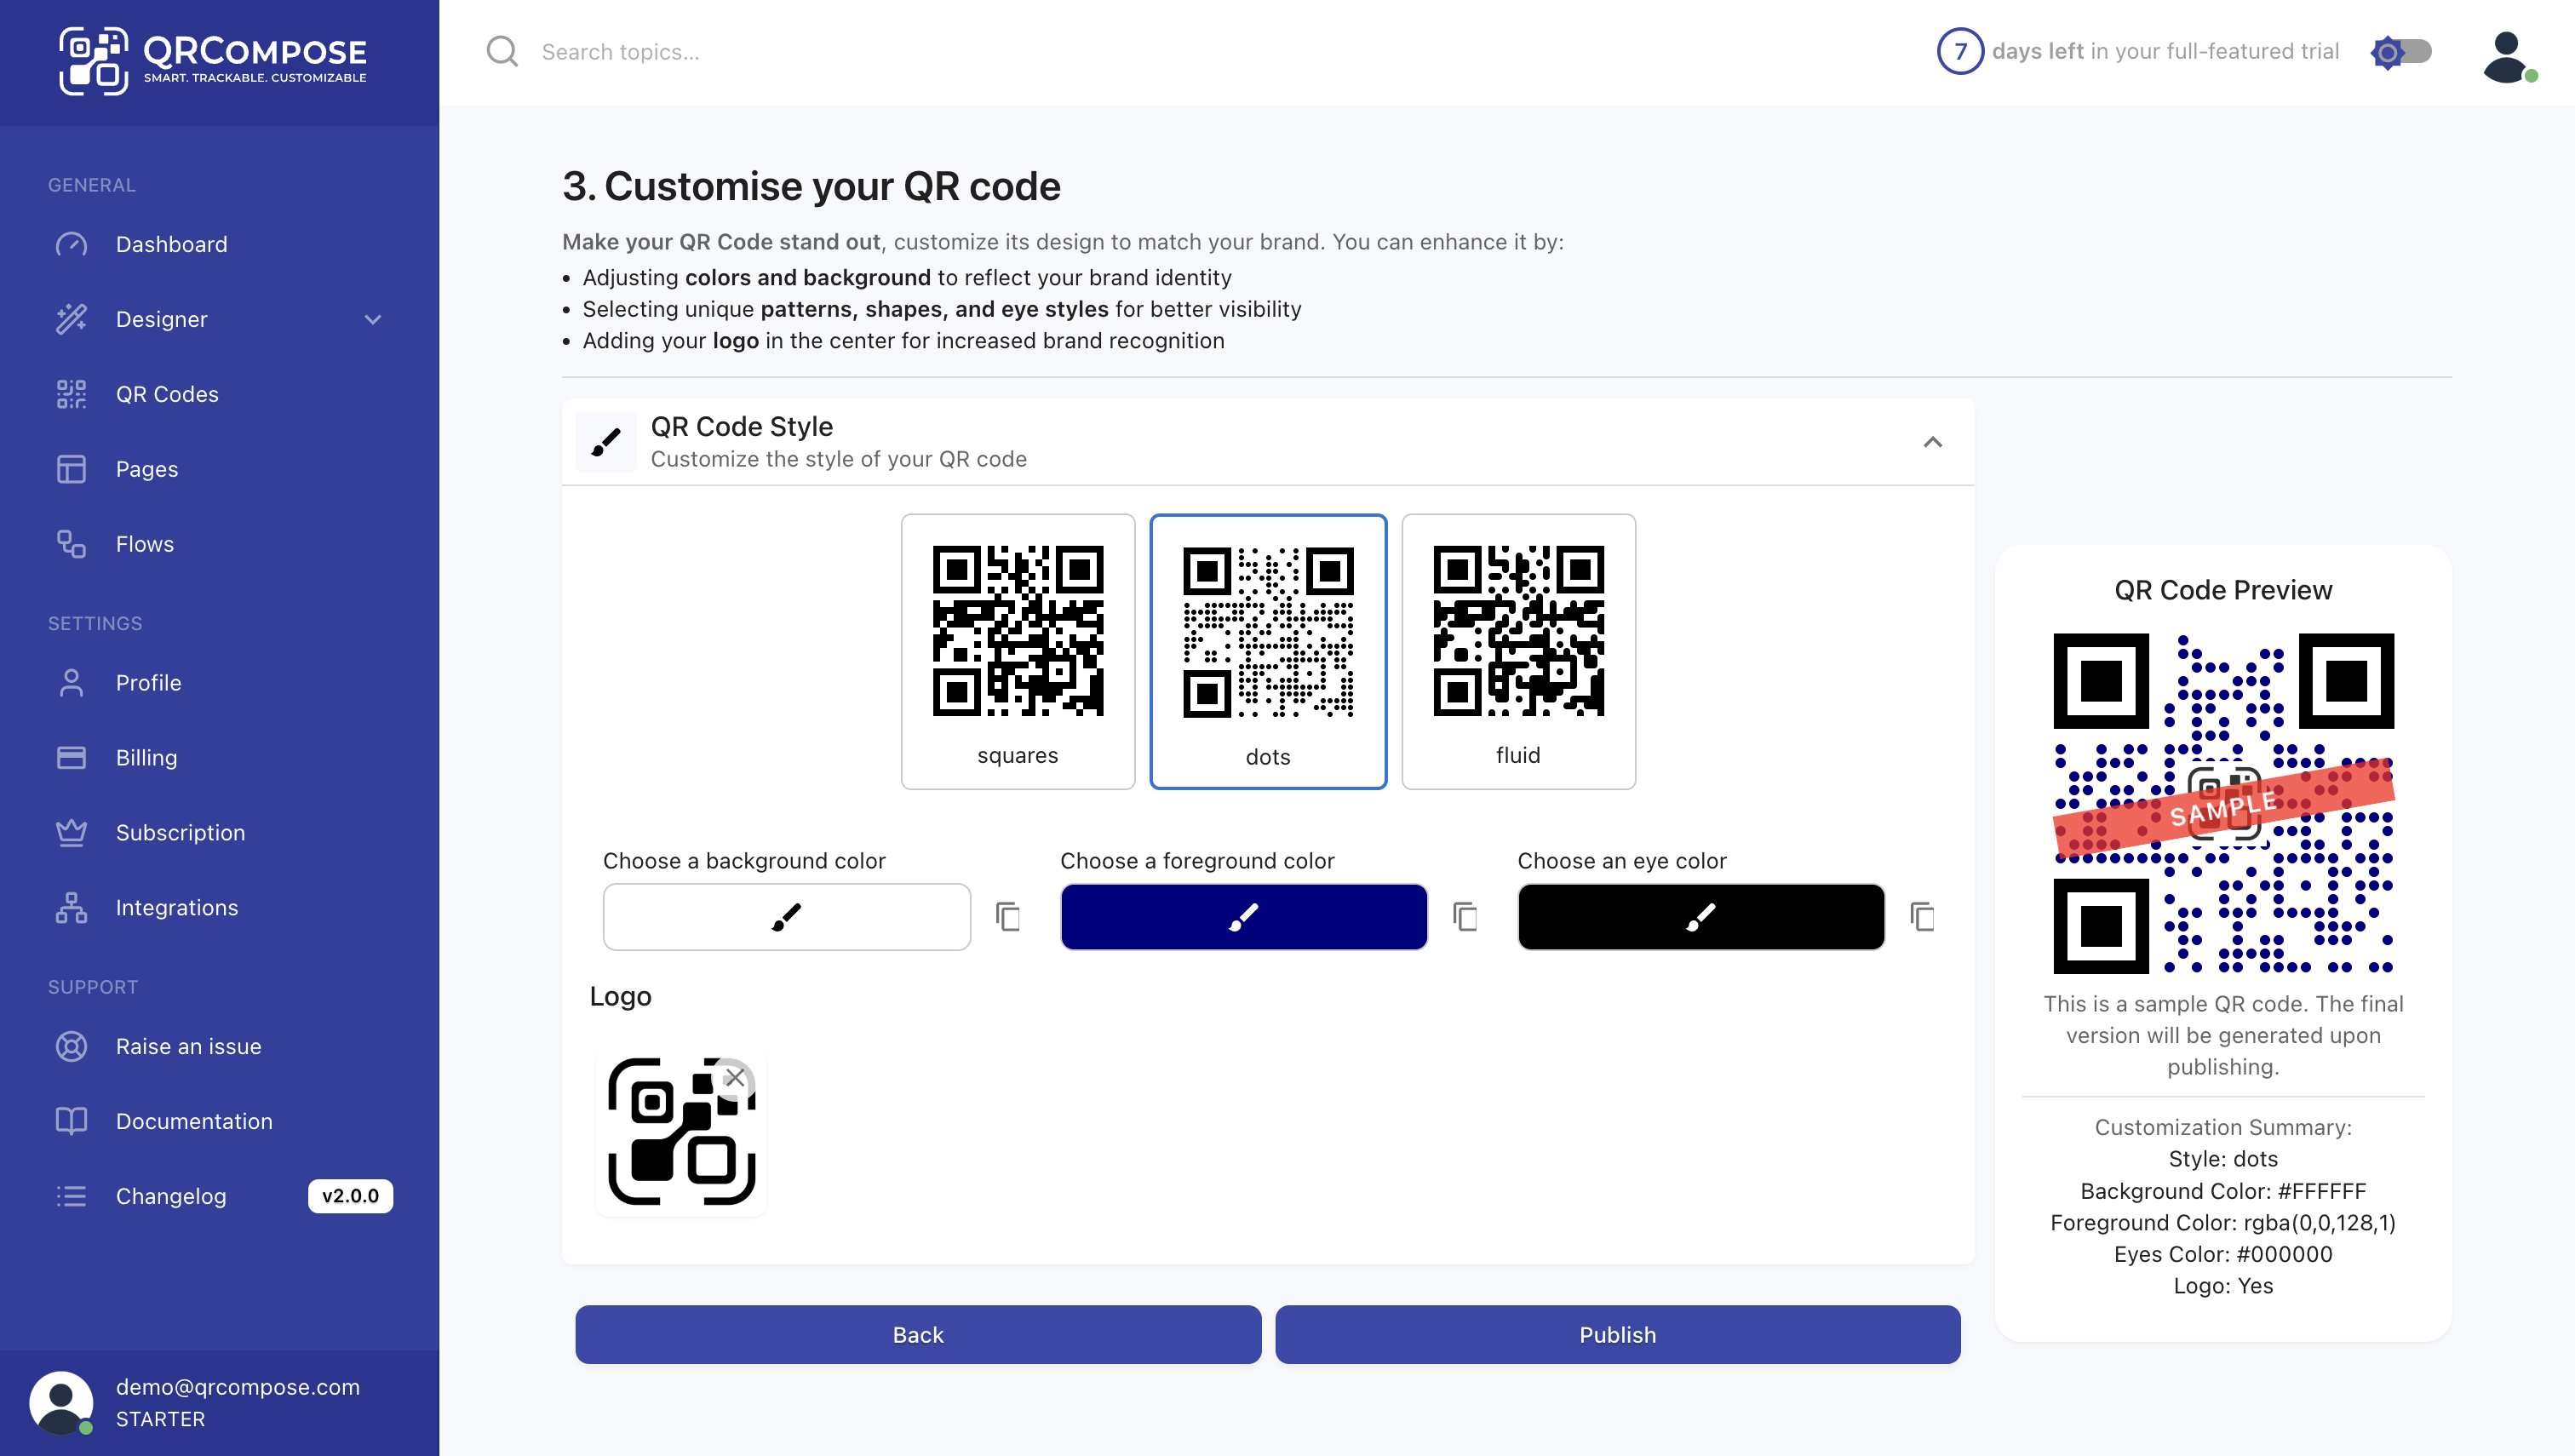
QR Scannability
Keep high contrast between your QR code and background for best scanning results. Test on multiple devices before printing.
Step 5: Publish Your Experience
Click Publish
Your QR experience is now live! 🎉
Download Your QR Code
To download your QR code, hover over it at the view page and click on the download icon.
Testing Your QR Code
Before printing or sharing widely, always test your QR code:
- Test on Multiple Devices — Try iOS, Android, and different QR scanner apps
- Check Load Speed — Experience should load in under 2 seconds
- Verify Links — Click every link to ensure they work correctly
- Test Responsiveness — View on different screen sizes
- Check Analytics — Make sure tracking is working
Testing QR Codes
Use your phone's camera app to scan the QR code. Most modern smartphones have built-in QR scanning in their camera apps.