
Forms
The Forms component in QRCompose lets you create interactive, mobile-friendly forms to collect any kind of user input.
From simple contact forms to advanced booking and registration systems, every submission is stored securely and can trigger payments or follow-up actions as part of a Flow.
Overview
A Form Page can include any combination of fields - such as text, email, checkbox, date, or booking inputs - and can be styled to match your brand.
You can enable bookings, limit time slots, and optionally charge for reservations directly through QRCompose.
All submissions are stored in your dashboard, exportable as CSV, and fully trackable through analytics.
Creating a Form
You can create a form in two ways:
- During QR creation - choose Page → Form in Step 2.
- From the Pages dashboard - click Create Page → Form, configure your fields, and publish.
Once live, the form can be linked to a QR code or connected to other pages via a Flow (for example, Booking → Payment → Confirmation).
Configuration Sections
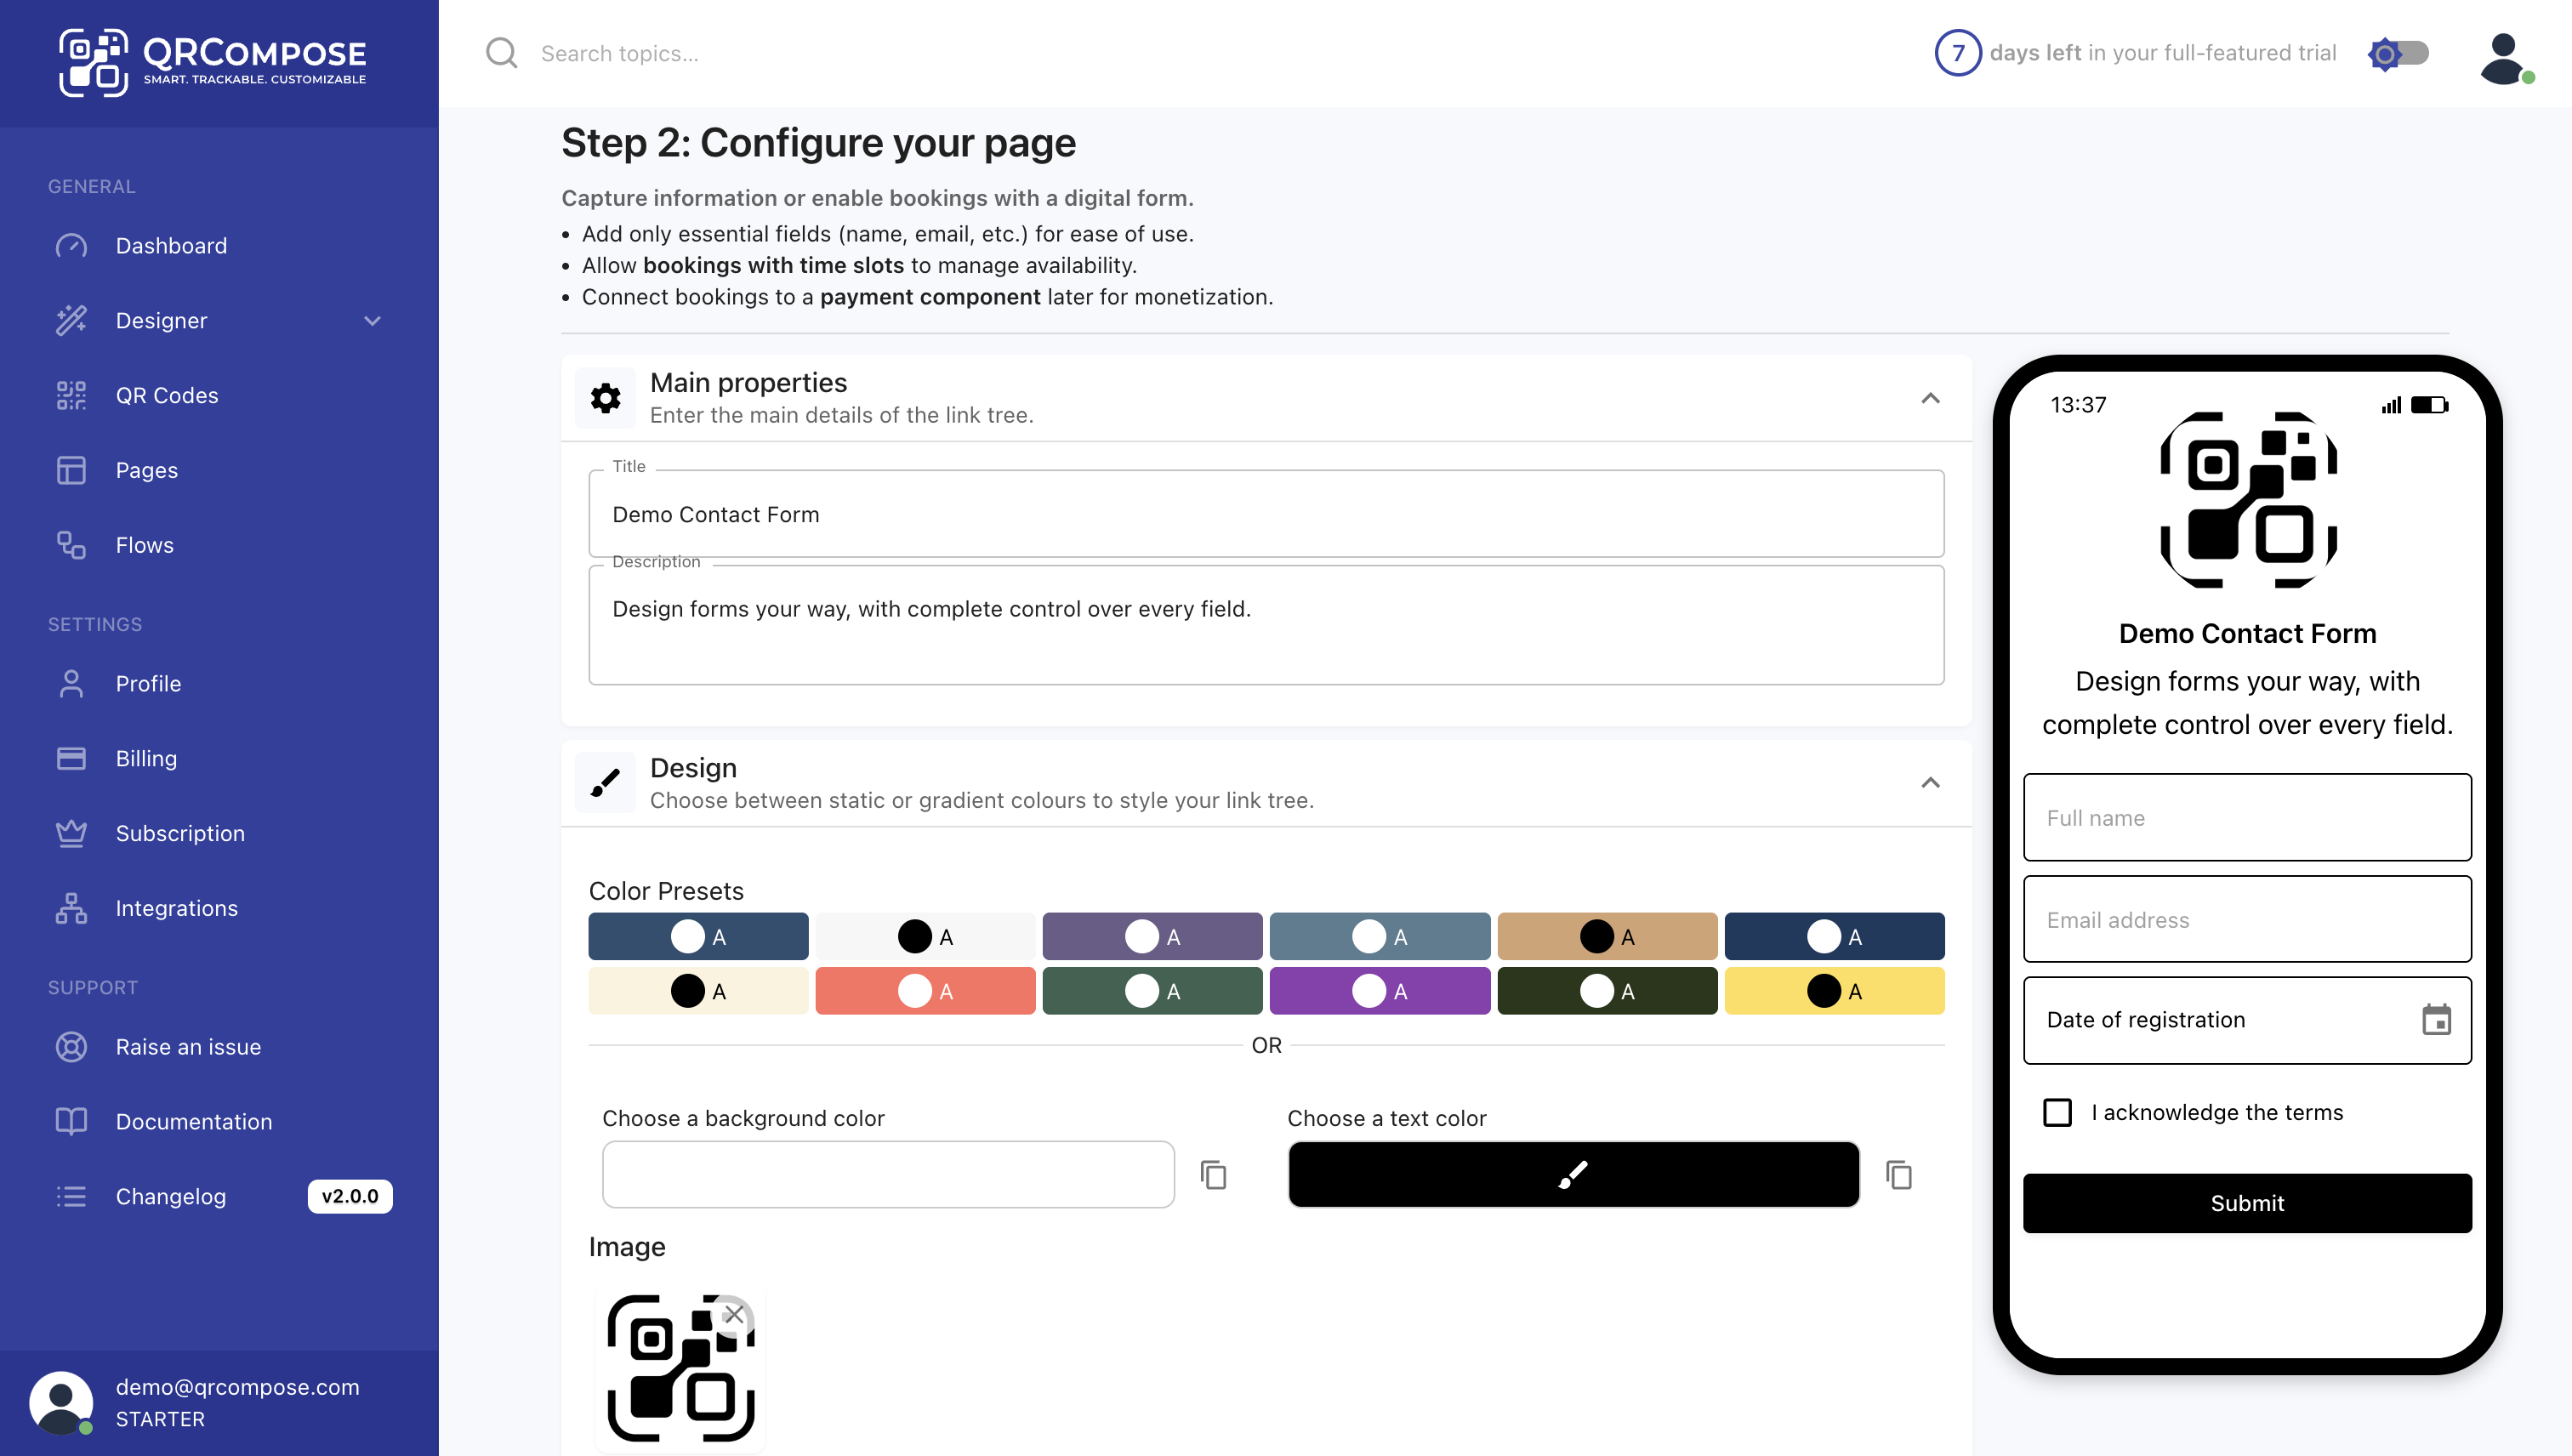
Main Properties
| Field | Description |
|---|---|
| Title | Internal and public title shown at the top of the form. (Required) |
| Description | Optional short introduction or instructions. |
Design
| Option | Description |
|---|---|
| Color Presets | Quickly apply a predefined color palette. |
| Background Color | Set a static or gradient background. |
| Text Color | Define the text color for labels and headings. |
| Image / Logo | Upload an image or logo displayed at the top of the page. |
Form Fields
This is where you define the structure of your form.
Each field includes:
- Type – choose the input type (Text, Number, Email, Password, Checkbox, Date, or Booking).
- Label – the text shown above or beside the field.
- Name – auto-generated based on the label (can be customized).
- Required – toggle to make the field mandatory.
- Reordering Controls – move fields up/down.
- Delete – remove fields (with a warning if analytics exist).
TIP
The first two fields are marked as Primary and Secondary - they appear as the first columns when viewing submissions in your dashboard.
WARNING
If editing a published form, changing or deleting fields may disrupt existing submissions.
For major structural changes, create a new form instead.
Supported Field Types
| Type | Description |
|---|---|
| Text | Free-text input for general use. |
| Number | Numeric input with optional validation. |
| Validated email format field. | |
| Password | Hidden input for secure entries. |
| Checkbox | Single checkbox for consent or binary responses. |
| Date | Date picker input. |
| Booking | Enables booking configuration (see below). |
Booking Settings (Optional)
If your form includes a Booking field, an extra configuration section appears.
Operating Hours
Set opening and closing times for each day of the week, or mark the business as Closed.
This defines available time slots for bookings.
Booking Duration
Specify the duration of each booking slot (in minutes).
Example: 30 minutes → visitors can choose start times every 30 minutes.
Slots Per Booking
Limit how many bookings can occur per time slot.
Special Closed Dates
Use the date picker to define holidays or one-off days when no bookings are accepted.
Currency & Pricing
| Field | Description |
|---|---|
| Currency | Choose the payment currency (EUR, USD, GBP, etc.). |
| Price per Person per Slot | Set a price for each booking. |
TIP
To enable payments for bookings, ensure you set a valid price per slot and connect the flow to a Payment page.
Data Handling & Submissions
All form submissions are:
- Stored securely in your dashboard
- Exportable as CSV
- Viewable with timestamps and field-level data
You can also configure notifications or include the form as part of a Flow for automated post-submission actions.
Analytics
Every interaction is tracked, including:
- Page views and unique visitors
- Submission counts and conversion rate
- Device and location of submissions
- Booking slot utilization (if applicable)
Example Use Cases
- Contact Forms: Collect inquiries or feedback.
- Event Registrations: Capture attendee details and RSVP info.
- Surveys & Polls: Gather responses in structured format.
- Appointment Booking: Let users reserve time slots and pay directly.
- Custom Flows: Combine forms with payments and review pages.
Best Practices
- Use clear, concise labels for fields.
- Mark only essential fields as required.
- Keep forms short (4–6 fields max) for higher completion rates.
- When using booking, keep accurate hours and time zones.
- Test your form before publishing to ensure validation and layout are correct.
Summary
The Forms component is one of the most powerful tools in QRCompose.
It lets you collect data, handle bookings, and even process payments - all inside a dynamic, branded, QR-powered experience.